No products in the cart.
Life goes on. We get older. We search for a partner to build a lasting relationship with and grow old together. To experience things together. To build a future together. To build a home together.
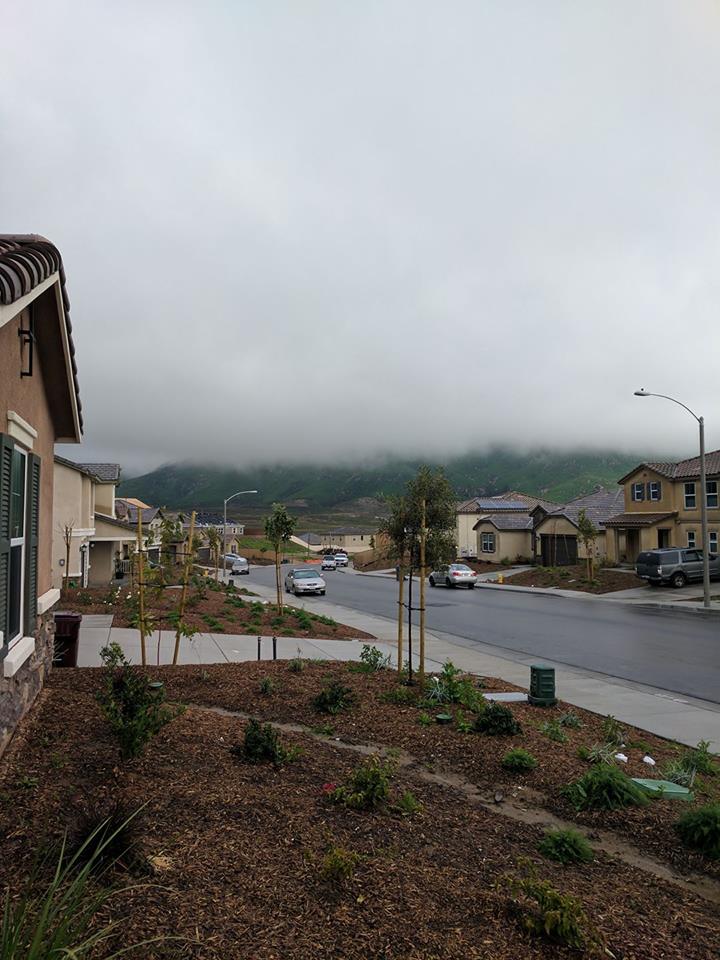
In my case, my wife and I had just purchased a house together. A very crucial point in our life. This is our first house. This is where we will hopefully raise our first child.
We were fortunate enough to purchase a new build house after several years of looking. After several years of putting down offer to be outbidded. But in the end, things worked out in our favor. We purchased a fantastic first house, which was much better than the other houses we had put offers on.
We were excited. We had so many ideas. So many things we wanted to do. So many things we will have to learn for the first time.
I had a list of DIY projects I wanted to do. Almost everything I’ve never done before. I knew I would have to learn new skills for the first time.
The first thing I wanted to do was re-landscape our front yard. The front yard was already landscaped . It had lots of mulch and was planted with drought tolerant plants. It was pretty and suited the environment, but it wasn’t something that suited us.
We wanted something more colorful. Something with more characteristic and charm. And I for sure, wanted to landscape it in a way my wife would love. In a way she would be proud of and show off.
This was a project that would take some time. Design layout needed to be planned. I will share with you over time, over several post on what I did.
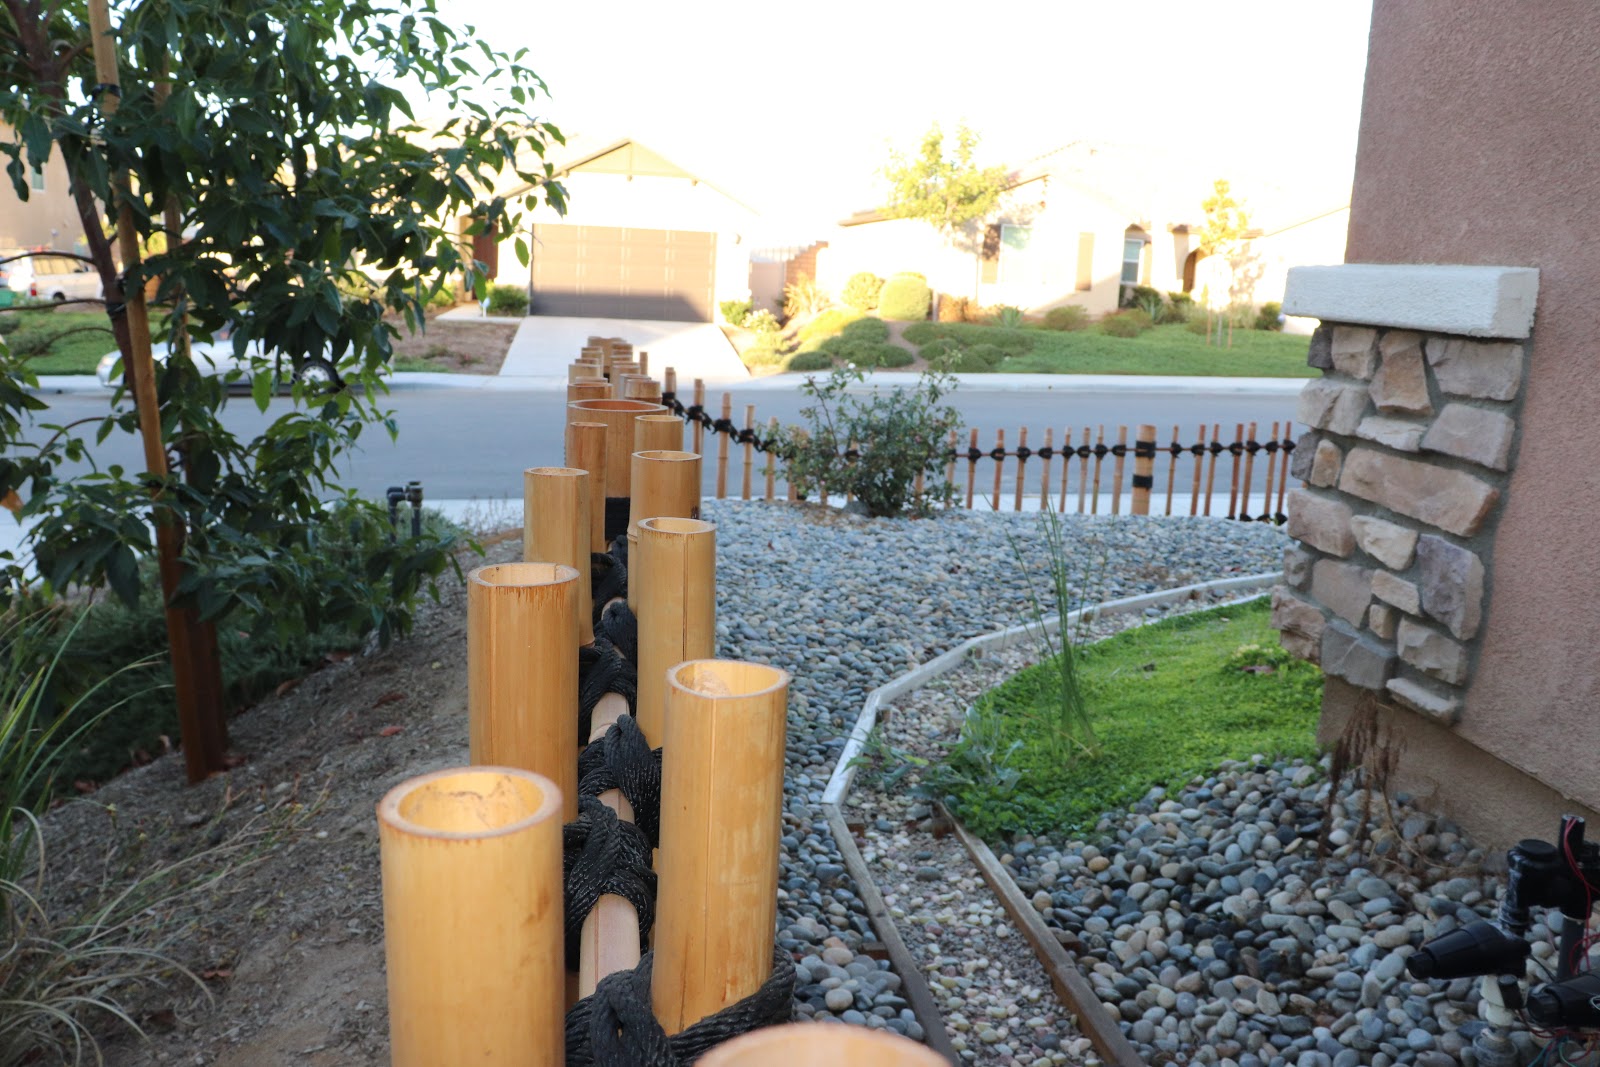
First thing I wanted to do was to build a waist high fence around our front yard. I wanted the fence to be unique. I wanted it to suite our taste. Many options were explored until I decided on one – bamboo lash fencing.
Before trenching, I needed to decide on the type of bamboo for this project. The bamboo needed to be of natural coloration. There were 2 bamboo coloration to decide upon – black and yellow. I went with yellow bamboo. Not sure why, but it just spoke to me more.
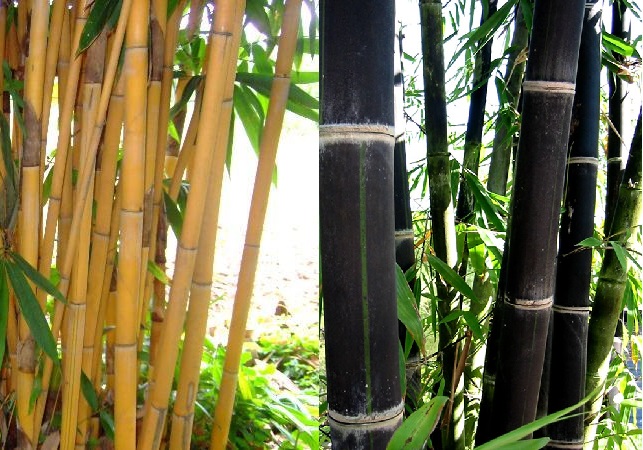
https://www.wilsonbrosgardens.com/Black-Bamboo-Phyllostachys-nigra.html
https://www.thetreecenter.com/golden-bamboo/
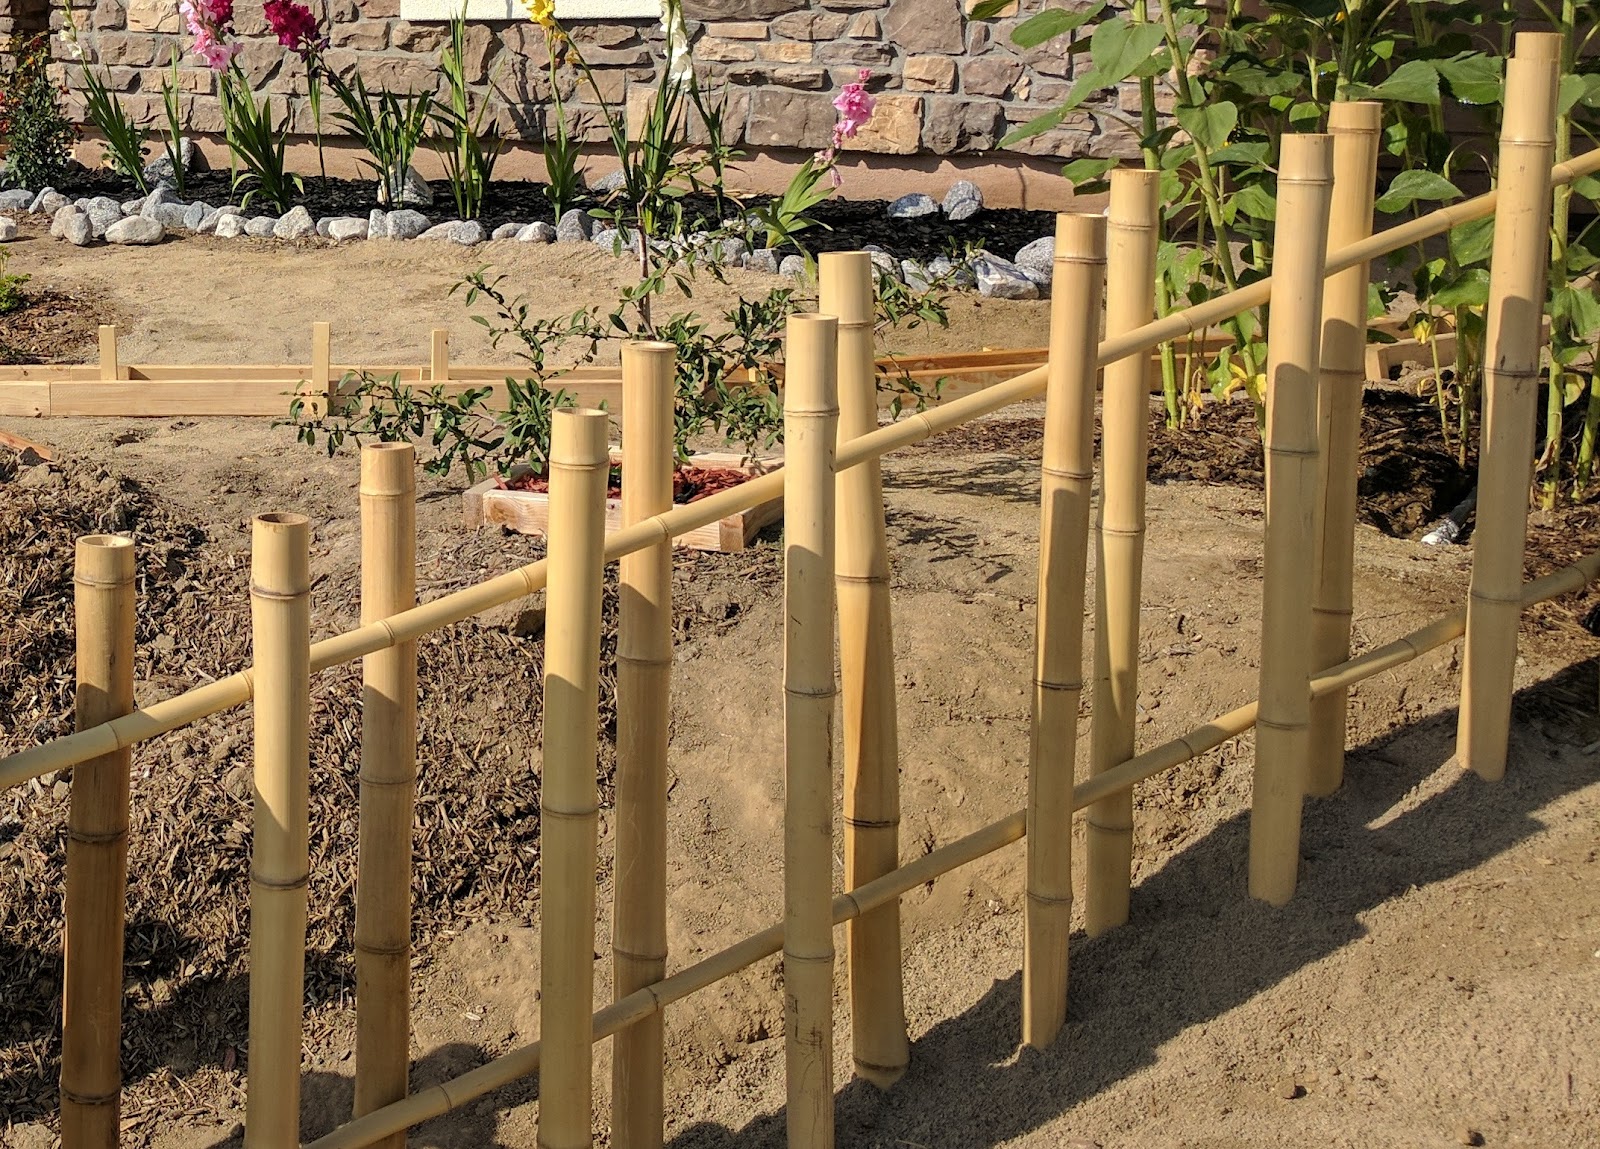
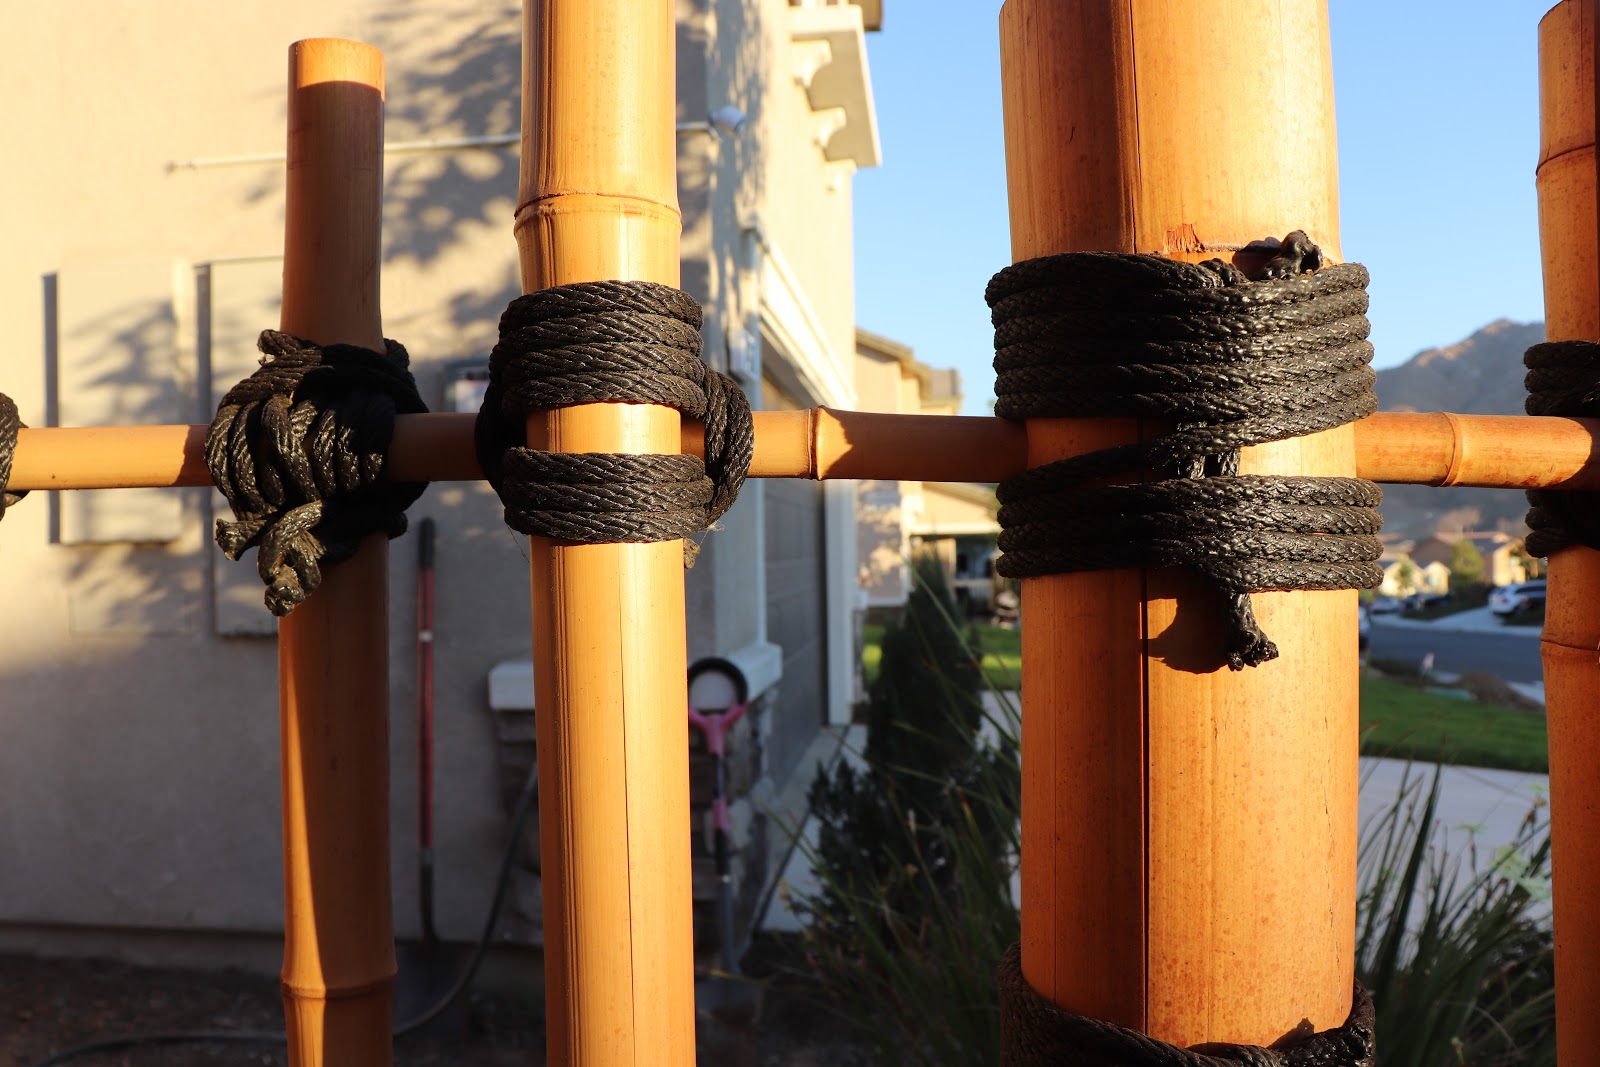
Next was to determine the thickness and the height of the required bamboo. There were 3 different sizes I needed, each with a specific function – anchor post, dividing column, and guide beams. Anchor post were 3” in diameter and 48” in height. Dividing columns were 2” in diameter and 48” in height. The guide beams were 1” in diameter and 8’ feet in length.
After receiving all the bamboo, I examined it all closely to make sure they were of good quality. I was happy to find that they were.
Time to trench! I decided to only trench down 12”. Depth does indeed sound shallow, but this was a low fence with light weight load.
The anchor post were placed 8’ apart. Concrete was used to make a more solid footing. Two 1” holes were drilled into the post for the guide beams to be inserted into. One hole 6” below the top of the post and another hole 20” from the bottom of the post.
Two guide beams were used in between each post. I had to make sure the beams were already insert into the post before I anchored them down. If not, I wouldn’t have been able to get them in after anchoring down the post.
Next, the dividing columns were placed in a zig-zag pattern 4”-5” apart from one another. No concrete footing was needed here so I just covered up the holes with dirt.
At this point, the fence looks very flimsy and shifted around a lot. I wasn’t too nervous though, there was still a lot of work to do. The most crucial part was about to start – the lash knotting.
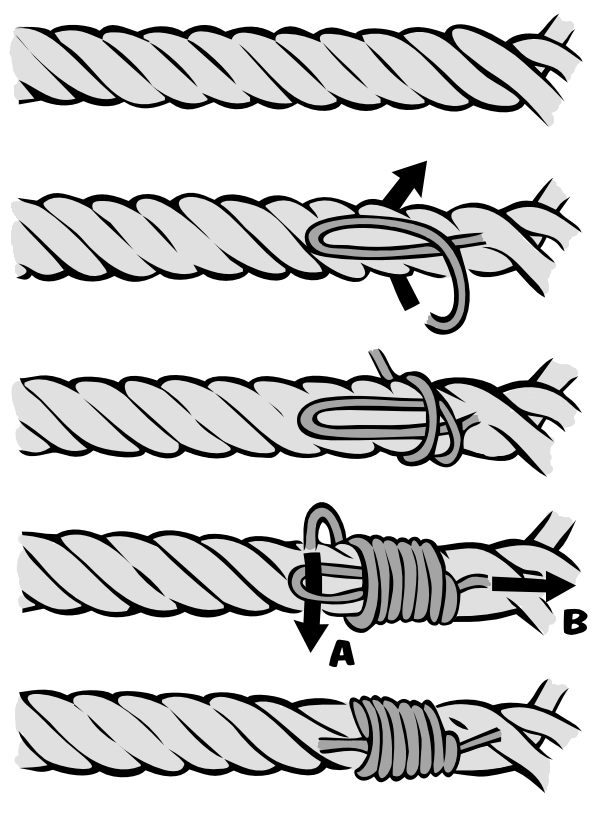
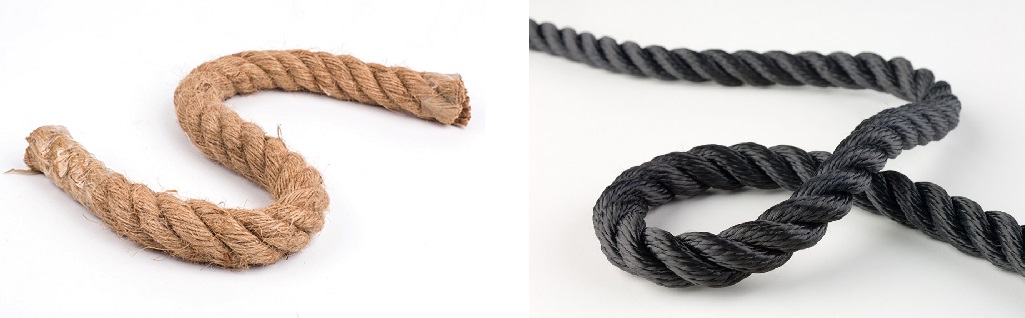
There were 2 kind of knots that I needed to learn and use in making my fence. First knot was the Japanese Square knot. Second knot was the common whipping knot.

http://www.slaattevik.com/jarle/tilhjemmesiden/japanese%20square%20lashing/japSQ.html
https://natureimmerse.com/tie-various-paracord-knots-less-time/
The Japanese square knot was used to tie the dividing columns to the guide beam. Two knots were needed per column, one for each guide beam. The tension knots were used on the anchor post, three per post. Two tension knots were used where the guide beams insert into the post. One tension knot was used in the center of the post.
Now that I knew what kind of knots I was going to use, I needed to find out what kind of lashing material I would need. The choice was between ¼” natural twisted role or ¼” black polyester cord. It took some time to debate amongst myself before deciding to go the ¼” black polyester cord. I like how the color of the rope and bamboo stood out from one another and the fact that the polyester cord could withstand the punishment of mother nature.
https://www.donaghys.com/rope-and-cordage/products/general-rope-and-cordage/rope/polyester-rope
https://www.alibaba.com/showroom/60mm-natural-jute-rope.html
After lashing about an 8’ section of the fence, I noticed something I didn’t like. The knots were too loose! I had to go back and redo the knots. This time around making sure there was a lot of tension when wrapping and tying the knots.
When all the lashing was done, I went back and trimmed any excessed rope. Taking it another step further and sealing the deal, I took a hand torch to the polyester cord. This final step ensured that the cord wouldn’t come unraveled over time.
This was my first big project after moving into the house. It was tedious and enhanced my tan line, but it was well worth it. The fence came out amazing and everyone who went by the fence couldn’t help staring or coming up to me to ask questions.

There are lots of choices in fencing. Have you ever put up a fence? How did it come out? What did you learn while putting it up? I would love to hear your thoughts and see some pictures of your fencing! Share with me in your comments or email us and we’ll share it with the world.